Method of installing wash toilet
Recently, the wash toilet has spread. The performance has improved to the price cheaply, too. It is the one sold by the brand name of "Washlet" or "Beauty-towale". It becomes impossible to live without this when the wash toilet is used every day. It is too convenient and the wash toilet is comfortable.
The wash toilet is installed with DIY.
The installation of the wash toilet is easy. If a little knack is understood, the installation is possible even by the amateur. Will you install it by yourself?I think that I am glad when becoming reference when installed for yourself.
An existing toilet seat is removed.

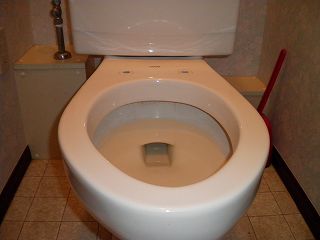
First of all, an existing wash toilet or a heating toilet seat or a usual toilet seat is removed. The toilet seat is only stopped by two holes in the interior of the toilet as shown in this photograph.
The nut made of plastic big that has stopped the toilet seat is loosened from the under and removed. And, it comes off if the toilet seat is pulled up.
The toilet surroundings are cleaned after this. Obstinate dirt has adhered, and clean it deliberately, please. When the urolith thick sticks to the mark and the toilet where the toilet seat was removed, it is the one that cannot be removed with a detergent alone easily. In this case, there is only shaving off physically by using water-proof sandpapers of detailed eyes. Because the surface of the toilet is damaged when eyes are rough, the one with detailed the 400th-800th eyes is used. It sells it also in the hundred-yen store.
The wash toilet is installed.

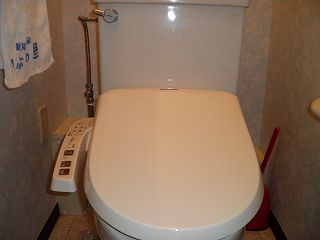
A new wash toilet is put on the toilet like having been installed the toilet seat. The toilet seat is moved back and forth and it makes it to a just good position.
Next, a plastic nut is installed from the under. At this time, the nut need not be tightened with the tool. Please tighten by the hand strongly.
It is OK if the whole is moved, and it adheres neatly. If it is loose, the nut is tightened further.
The divergence plughole of the attachment is installed.

It seems not to have to stop the main cock of water service when a recent wash toilet is newly installed, and there might be a necessity for closing the main cock of water service when an existing divergence plughole is removed.
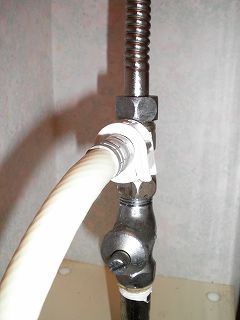
The main cock in the rest room is closed with the flat screwdriver when newly installing it. The flexible tube is removed by the spanner for this photograph. At this time, please water in piping must come out, and roll the dustcloth and do.
The divergence plughole of the attachment is installed on the side of the main cock just behind in the rest room as shown in this photograph. At this time, the gasket of the attachment is put and it does for remembrance' sake. Do not tighten the nut of a flexible tube where the gasket made of rubber was used very strongly.
It does like inserting the divergence plughole on the way of existing piping. Former piping is installed on the side of the divergence plughole in the back. It only undergoes plastic operation on the flexible tube for the flexible tube. Piping might be cut with the pipe cutter at the pipe piping.
Even the amateur can easily install it by changing the pipe piping into the flexible tube in this case. A long flexible tube is bought in the do-it-yourself store if the length of the flexible tube of the attachment is insufficient.
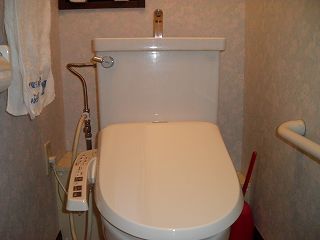
The installation of the wash toilet has been completed.

It connects between wash toilets with the divergence plughole with the hose of the attachment. Only because the hose is inserted, and the omission stop is installed, it is easy.
Afterwards, the main cock of water service is opened and water is turned on. It is confirmed not to find the water leak. The ground lead is connected, and the plug is inserted in the outlet.
The vinyl seat is paved under the toilet seat. The sensor is covered with the hand and the sensor is operated. And, the wash toilet is made a hips washing mode.
When the washing water comes out, other modes are tested. The installation of the wash toilet was completed by this.